Starting from the Neptune DXP 22 – Open Edition LTS we can use a Redis server in our applications. Today I want to share with you how I was able to setup a Redis server in order to create a simple application in the App Designer and trigger an event.
Redis is not officially supported on Windows but we can use the Windows Subsystem for Linux (WSL2), just make sure to use Windows 11 or 10 (build 19041 and higher):
- open the Windows Command Prompt in administrator mode, run the following command and restart your machine
wsl --install
- if the command is not working you may need to enable the optional features in Windows > Run > optionalfeatures.exe and turn on Virtual Machine Platform, Windows Hypervisor Platform and Windows Subsystem for Linux, then restart your machine
- open again the Windows Command Prompt and run
wsl
- the first time you will need to create a new UNIX username and password
- install Redis with the following commands (enter the password you created before)
curl -fsSL https://packages.redis.io/gpg | sudo gpg --dearmor -o /usr/share/keyrings/redis-archive-keyring.gpg

echo "deb [signed-by=/usr/share/keyrings/redis-archive-keyring.gpg] https://packages.redis.io/deb $(lsb_release -cs) main" | sudo tee /etc/apt/sources.list.d/redis.list

sudo apt-get update

sudo apt-get install redis
- run the Redis server
sudo service redis-server start
- you can test the server connection (you will receive PONG response if is running)
redis-cli
ping
You can find the documentation in the official website:
Redis Installation- Open the Planet 9 Cockpit and go inside the System Settings > Database
- In the In-memory database input enter the following URI (replace 127.0.0.1 if is not local)
redis://127.0.0.1:6379
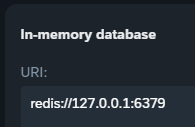
- Restart the Planet 9 instance
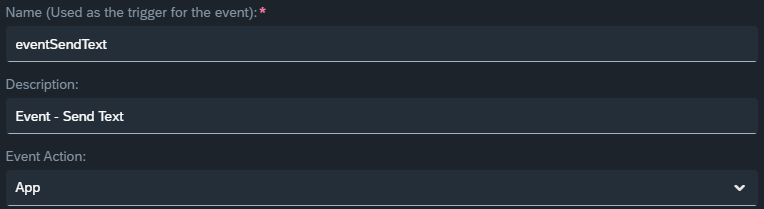
- In the P9 Cockpit go to the Events and create a new one (Event Action needs to be App, as we will use it later in the APP Designer)
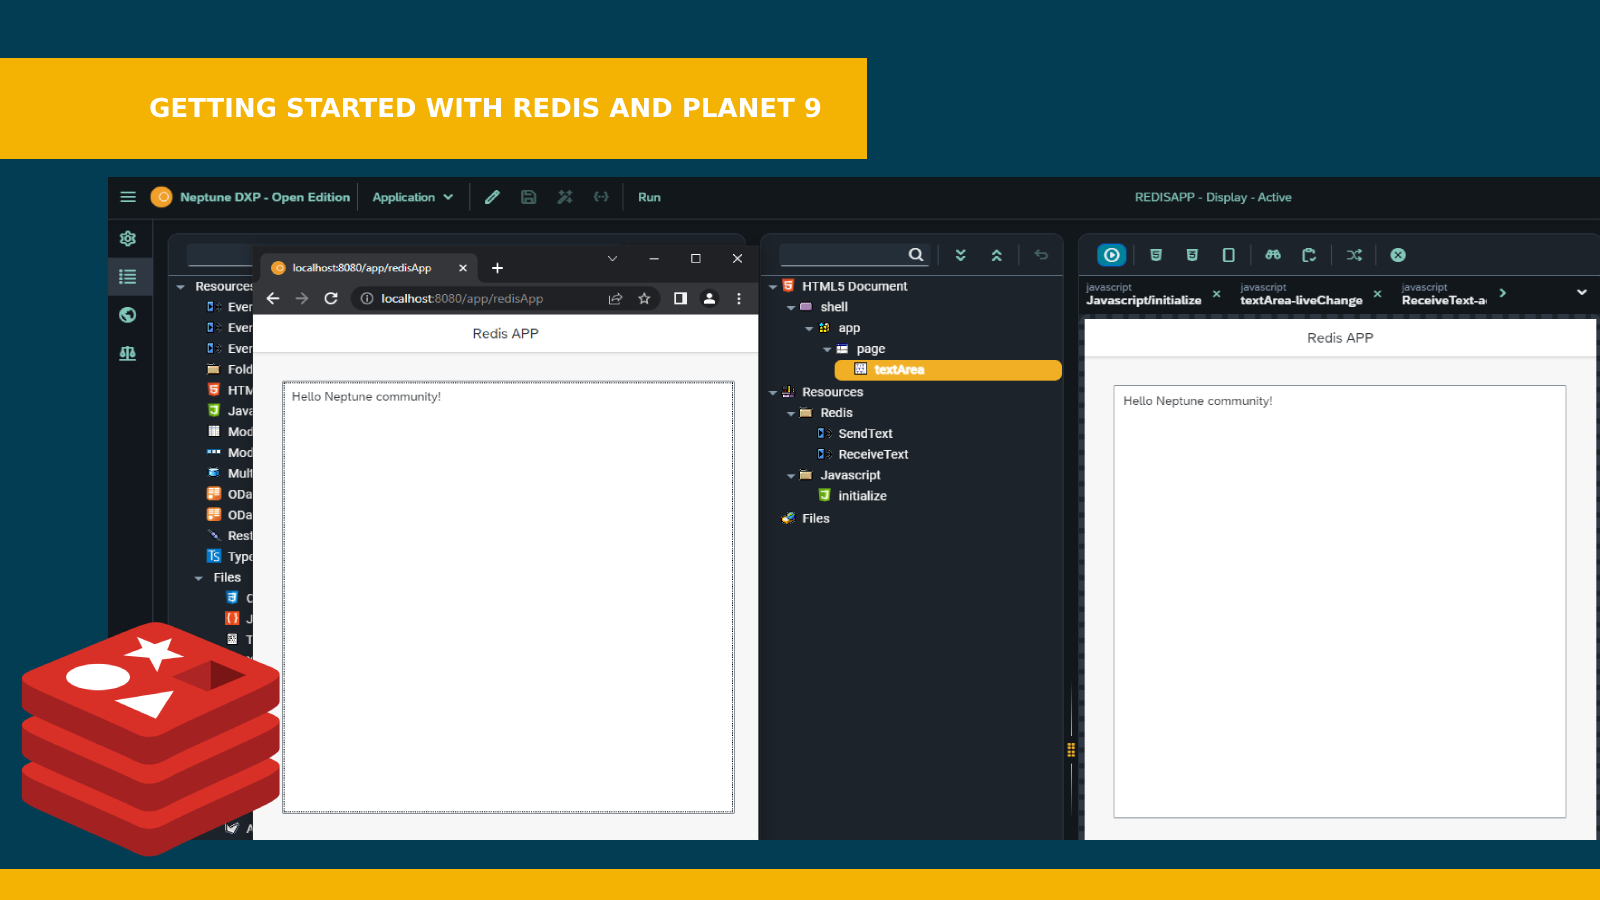
- Open the App Designer and create a new application
- In HTML5 Document insert the following elements: sap.m.Shell > sap.m.App > sap.m.Page > sap.m.TextArea
- In Resources create two folders Redis, Javascript
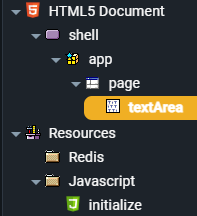
- Drag and drop a new EventListener and EventTrigger elements inside the Redis folder

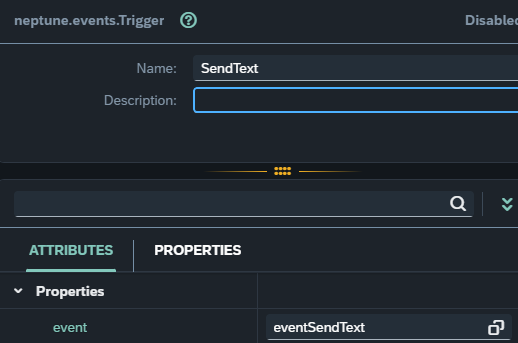
- Select the EventTrigger, rename as SendText and under the property event select the one created before. This element will be used when the user will change the content of the text area, in order to send the new text via Redis to other users connected in the same app
- Select the sap.m.TextArea. go inside the liveChange event and use this code to call the Event Trigger
let newText = this.getValue();
triggerSendText({text: newText});
- Select the EventListener element, rename it as ReceiveText and set the property event with the one created before
- Open the action event of the Listener element and add the following code, this will update the text area content for all users connected to the app
if (data.text) {
    textArea.setValue(data.text);
};
Open the app in two different windows and start typing inside the text area. Here a GIF:
Open GIFYou can find more details here:
Event-Driven Architecture (EDA)In January i created a simple game using this technology: JD Bingo – Game built in 1 day with Planet 9 and Redis
Hope this basic example can help.
Happy coding!